Thursday, December 11, 2008
Ricoma Laser
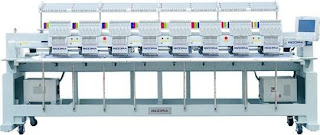
Ricoma's new RL-6030 laser engraving and cutting machine can generate a whole new customer base for your existing embroidery business, or assist you in starting a new and exciting business from scratch. Please contact us at info.ricoma.us or call us at 1888-292-6282 for more details and pricing.
Tuesday, December 9, 2008
The Nike Dunk Hi Premium with Laser Substraits
Originally used in industries such as car manufacturing, electronics and furniture texturing, laser technology has been a tool in Nike’s shoe design headquarters for years. But it was in 2003 that Nike Designer Mark Smith pioneered the use of lasers for decorating leather, fine-tuning the process to a level that allowed incredibly detailed designs to be burned into Nike products. It wasn’t long before famed footwear like the Cortez, Jordan and AF1 were etched with intricate, tattoo / graffiti graphics, models that are still coveted by sneaker collectors around the world. But laser-etched leather had a design limitation: no matter what the upper’s colorway was, the burned-out designs were always brown, leather’s interior color.
Called a “substrait,” Jesse Leyva’s team wondered if they could change this interior color by changing materials. The solution was found by using synthetic materials. The Nike Sportswear Dunk Premium uses black synthetic material with various colored interiors to achieve this multi-colored substrait effect. Each panel of the shoe contains a different color which, when the top layer is carefully etched away, is revealed in high contrast by the laser. This season, the motif is the octagon—a symbol chosen by Nike’s design team to represent the summer games in Beijing and to honor the power of the number eight in Chinese culture. A byproduct of using synthetics in the Nike Dunk upper is a reduction in the shoe’s overall weight, since leather is heavier by nature than its man-made alternative. Along with a black body that allows the colorful shapes to pop visually, a patent leather swoosh and highly perforated vamp are premium design accents that give the sneaker a stealthy, yet sophisticated air.
Wednesday, October 22, 2008
Extend The Life of your Machine
Just like your car, your embroidery machine needs regular maintenance, to assure it is working at its optimum performance level and maximize its lifespan.
Oiling
Embroidery machines run at high speeds and high speeds create friction and heat, proper oiling reduces that friction, and the damage it can cause. There are oiling ports all over your machine and the manual clearly outlines the lubrication intervals for each port. After oiling make sure there is no excess oil, which can stain the products you are embroidery.
Cleaning
Thread creates lint as it is drawn through the needle, dust is in the air, when you combine them with oil, particularly in the hook assembly of your machine, a paste is created which can affect the tension on your bobbin thread and ultimately seize the hook. To avoid this it is necessary to clean the hook assembly area with a brush or canned air at least once a week. Also check your bobbin case to make sure the thread path is clear of this same oily residue.
Lubrication
Thee are areas of your machine which require a heavier lubricant than oil, those areas require greasing, you can find the required schedule in your manual.
Regular Check ups and Maintenance
It is always a good idea to schedule a machine check-up with your technician at least once a year. The technician can determine if there are potential problems with your machine that can be remedied before they develop into larger issues which can interfere with your productivity.
In the long run, the small amount of time it takes to take proper care of your machine will be more than made up by the increased performance and productivity you will ultimately achieve.
Embroidery Essentials
Accessories might seem to be a fairly dry subject, but threads, needles, and backings are the heart of the embroidery industry; without them there would be no embroidery. They make up what embroiderers create, package and present to their customers. Without these tangibles, all our customers would be presented with are ideas. It is therefore exciting to find and explore the uses of new and unique products, which can either change the personality of the product or ease the production process.
In fashion today, embroidery is big and it is present in every form. There is hand embroidery, chain stitch embroidery, cross stitch and lock stitch embroidery, all equally sharing the spotlight. Along with this new found notoriety has come a more sophisticated appreciation and awareness on the part of the consumer. Buyers see more embroidery on a regular basis than ever before. They also see a myriad of thread types and weights combined with varied densities and stitch types.
In response to this thread manufacturers are developing new thread options not just to feed the needs of embroidery producers, but also those of the newly educated consumers.
Of course, the new look is not created by thread choice alone; it involves fabric choices, embroidery techniques and digitizing innovations. New fabrics often require the development of new needles, backings, toppings and other accessories. They also may require new hooping and alignment guides to facilitate the coordination with the grain of the fabric or its pattern. Sheer fabrics require their own set of digitizing rules and backing considerations. The list goes on and on- each new product, fabric, thread or digitizing technique can produce a domino effect touching every aspect of the embroidery production process.
Wednesday, October 15, 2008
Corporate Couture
Mixing embellishment techniques can create spectacular results.
The typical corporate identity goal of the past has morphed into a much more fashion forward statement. While the appeal of logoed garments started out with the goal of creating a unified and consistent corporate identity, companies no longer want that identity to match that of their competitors. Companies are finding it essential to stand out from the pack and for many, multi-media embellishment options have proven to be incredibly successful.
There are many options outside of the techniques discussed in the article such as foiling, direct to substrate printing, embossing, transfers, sublimation and screenprinting, but owing to space constraints, I am concentrating on appliqués, laser cutting and engraving, sequins, soutache, puffy foam and chenille.
Applique
Applique, the addition of a separate piece of fabric to act as a section of your design, is the most popular technique employed in embroidery for many reasons. It is easy, doesn’t require any additional equipment, has a very rich polished look, and it can save you money in the long run by significantly reducing the manufacturers production time. Even though it requires time to lay down the appliqué piece or pieces along with the additional expense of having them pre-cut, these expenses are easily offset by up to an 80% reduction in stitch count. This is also a great alternative because manufacturers who offer this option are readily available.
Laser etching and cutting
The most exciting addition to the world of embroidery in recent years is laser cutting. While lasers have been used to cut appliqués before they are applied to the garment, the new beam lasers actually cut the appliqué on the garment itself during the embroidery process. They can also be adjusted to etch the surface of the fabric to match any artwork or photograph. This opens up the doors for more elaborate and detailed appliqué shapes as well as the addition of etched graphics which can take your logo or design in a much more multi-leveled and textural direction.
Sequins
While sequins might initially seem to be an unlikely fit in the corporate identity world, there are many appropriate applications in conjunction with fundraisers, events and customer giveaways. Sequins add a unique high-end look to caps and bags. A few sequins can spice up a design and because they can take the place of thousands of stitches, reduce its cost. Sequins can also transform to most mundane design into a great attention grabber.
Soutache
Soutache or cording is applied to the embroidered design through the addition of a cording foot. It can be used to create three dimensional lettering or to add dimension and texture to areas of your design or logo you wish to emphasize. It can only be used to create very simple shapes but when paired with standard embroidery you can achieve fine detail and rich texture.
Puffy Foam
Puffy foam is a thin layer of foam that is laid down before the design is stitched out. Designs need to be specifically digitized for this process, as the needle penetrations perforate the foam as the stitches cover it, trapping it under the areas of your design you wish to elevate or raise up above the surface of the design. The remainder of the foam is torn away leaving only the pieces enclosed under the embroidery. This is a great way to make a logo gain prominence with a design. Remember, however any design created with foam can not be dry cleaned as the fluid will melt the styrene foam.
Chenille
Texture has always been the major draw to embroidery, but the traditional textural techniques alone can make your logo all too similar to your competitor. This is where Chenille comes in. Chenille is created using two different stitches; chain and moss. The moss stitch consists of loops of yarn, and the chain stitch is a flat stitch primarily used to make the edges of the moss stitch look neater and more consistent. Chenille has always been a specialized sector of the embroidery industry, which makes it more difficult to find a supplier. Corporations, schools, teams, fashion designers, organizations, fraternities, sororities, clubs, individuals, movie studios, Grand Prix and Motorcross, pop and country music stars, and sporting goods team dealers all use chenille embroidery and the demands are greater than the services available, so if you decide to go this route make sure the manufacturer can fit your needs and time frame.
Money and time Savings
While choosing to combine various embellishment techniques is usually a design decision, the combination of other decoration techniques with traditional embroidery can also make the product more cost effective. Embroidery is the most costly embellishment technique, by replacing portions of your design with less expensive options you can reduce the production cost of the entire process.
When deciding on a multi-media design, you should start by considering your options. Then it is necessary to find an advertising specialty distributor or embroider with a knowledge of the processes and access to the equipment to produce the desired embellishment combination. Last you need to make sure that the cost is justified and fits within your budget. Endless multi-media combinations continue to be increasingly available, so it is easy to choose the combination that works best for you.
Monday, September 29, 2008
Choosing The Right Stitch Type
Satin stitches take center stage because they reflect the most light (shiniest). Use this stitch type for whatever you want to be most prominent in your design. Running stitches and fill stitches are much duller because they are comprised of small stitches which don’t reflect as much light. To increase the prominence of these stitch types increase their stitch length. When you vary stitch types and the direction of those stitch types within your designs you increase the interest and complexity of the overall design. Embroidery is an art form with texture. We create more textural interest when we vary stitch type and direction. We basically use running stitches for detail work. Satin are used for filling thin areas and borders and for creating focal points in our designs. Fill stitches are used for filling large areas with stitching.When you vary the direction of the stitches in your design you assure that the light will hit the design at different times from different angles, this gives the design a lot of life. You can also use this to create 3-dimensionality in the design. As you change the angle of the stitches you can make the area of the design recede or jut out.By experimenting with the different stitch types and direction you can come to realize what a huge impact this can have on the effectiveness of your embroidery.
A Printing Revolution
Probably the largest advance in the area of garment decoration in decades, direct to substrate printers, are rapidly increasing the practicality of low volume printing. Now last minute printing orders or small run fill-in orders are no longer a problem. To buyers of promotional products, this technology is a boon for many reasons. The technology essentially eliminates set-up costs, allows for any size order, and gives you the detail and vibrancy of screenprinting while maintaining the hand of the fabric.
While embroidery is the decoration choice for uniforms and corporate image apparel, there are times when either the quantities or costs are a consideration. In the past screenprinting and transfers were the only other alternatives. Now you have a new weapon in your arsenal of low cost product choices.
The Process
Direct to Substrate printers work in much the same way as office ink jet printers. Their main advancement over a traditional ink jet printer is that they allow for the printing of vibrant colors on both Black and White 100% and cotton blend garments. Some fabrics do require pre-treating, and all fabrics require curing to make the image permanent. Direct to Substrate Printing, is exactly that, you print directly onto the item. Unlike other solutions that use inkjet technology, the DTS printers does not print onto a "transfer material" like Iron-On's. The DTS prints your image directly onto your shirt or other object. With Screen Printing, you must first separate the image into "color separations". From these separations you then create screens to which the ink is "pressed through" and onto your garment. After the print process you must clean the screens for reuse, using harsh toxic chemicals. This is time consuming and adds to the expenseThere are a few limitations to screen printing. First, screen printing can only be used on a limited number of items and garments. The DTS’s can print on textiles and non-textiles alike! Screen printing has a limited resolution. On top of that, you must create a screen for every color you use. DTS printers hve an amazing resolution and can print millions of colors. The DTS printers require no screens, little image prep time and prints shirts in seconds.
Cost Consideration
One thing that you might want to take into consideration when planning an order is that the cost for light colors on dark garments is usually higher as the process is more time consuming. The additional cost is due to the additional time it takes to print on dark substrates.
Because there is relatively little set up required to prepare a print, this method can be very cost effective.
Advantages
Another advantage to DTS is that it combines very well with embroidery, Because the process does not affect the hand of the fabric, embroidering on top of it is no problem at all. Because you can print just about anything from photographic detail to bold graphics, DTS allow you to create precision images with unlimited blending of colors which is not possible with embroidery alone. You can then add depth and texture with embroidery on top of the image, to create a focal point. This combination affords both the detail from the DTS printer and texture from the embroidery.
DTG printing can also be combined with screenprinting, which is especially advantageous if you have a design that is constant such as a logo which needs to be combined with different names or titles. The logo can be screenprinted in bulk and the individual names or titles can be added later using the DTS printer.
While DTS printers are not the answer to all of your decoration needs, they certainly offer a very good alternative to screenprinting in situations where screenprinting would be cost prohibitive.
Wednesday, September 17, 2008
Home Decor
The new "Do It Yourself" home design industry is flourishing. Businesses such as Home Depot, Lowes, and Builders Square are located in just about every town in the country, and that is where people are shopping, in order to do as much of the work themselves. Saving money and getting creative with our homes is a very popular hobby. for many is relaxing and at the same times allows you to get the exact look you want, in a very economical way.
Embroidery is a perfect tie in to this bureoning industry. Embroidery is all about customization. When we embroider something, we make it unique. This is a particularly desirable concept when we are talking about designing our own private oasis away from the hustle and bustle of daily lives. What better way to design your own environment than by embellishing it with embroidery, which reflects your unique tastes and interests?
Aside from its personalization abilities, it can also be a design tool. Embroidery can be used as a unifying design element to tie a room together. You can use it to add the wallpaper design to the guest towels in a bathroom. It may be used to echo a carpet pattern on a throw pillow or to change the personality of an ordinary item.
For example, take a simple white pillow and add a blue anchor, and it becomes the perfect accesory in the cabin of a yacht or the back deck of a cutty cabin. Add some bold abstract orange daisies and the pillow becomes the perfect accent for a 60's themed Soho studio. If you add heaps of building blocks it becomes the perfect addition to a child's playroom.
The home decor segment of the embroidery industry is not an easy one to break into. You often need the right connections or need to be in the right place at the right time, but if you do it can be very lucrative and create tons of word of mouth business.
Friday, September 12, 2008
Bobbins Up
As embroiderers, our biggest concern about the appearance of our end product is focused on the top. However, bobbin thread also plays an important role in the embroidery process. If the bobbin thread is too tight, the embroidery ill pull in, causing running stitches to disappear and columns to look too skinny. If the bobbin thread is too loose, you will see it on the top of the embroidery, and that might even be worse. In addition to tension, there are other points to consider, such as the many different bobbin thread choice from which to choose- cotton, cotton poly blends, monofilament polyester and spun polyester.
On top of that, it comes in many different packages, such as cones, and pre-wound bobbins. If that isn't enough, pre-wound bobbins come with or without cardboard sides and magnetic and non-magnetic.
In most cases we don't care what the bobbin looks like as long as the top of the embroidery looks fine. The are, however, times when the back is just as important as the front. When embroidering on director's chairs, for example, there is not really any practical way to hide the back, so it becomes important to make sure the back looks as good as possible. Napkins and Handkerchiefs are two more product where this also applies. One way to make the back look better is to wind your own bobbins using the same thread you are using for the top stitching. This will make the back of you embroidery look much the same as the top. There is also the issue of backing, when the back side of the embroidery is visible you don't want any backing showing. For most woven fabrics you can use a tear-away backing, in which case the excess backing can be torn away after the embroidery is done. There are instances where you don't want the backing to show through the embroidery, in those cases you can use a water or heat soluble backing.
Bobbins Up
Reverse or bobbin embroidery is another process where the bobbin takes center stage. The reverse embroidery technique uses the bobbin thread as the finishing thread. This is usually accomplished using metallic or floss thread in the bobbin case, which you combine with a similarly colored rayon thread in your needle. Since the finished side is the back side, make sure that you hoop the fabric upside down. Your tensions should be set so that the bobbin thread is pulled to the top of side of the fabric. (loose bobbin, tight top thread) This will ensure that the top thread is invisible in the finished embroidery. Because in the case of floss, you are working with heavier thread, your density should be lowered to about 30 stitches per inch. The finished result will look as though the the thread was hand- sewn using a loop stitch from the bottom.
The thread you choose for your bobbin can have a profound effect on your finished product. It can add to the professional look of the design, it can add texture or it can even make up your finished design. These are just some of the options that you have for bringing you bobbin thread to the forefront of your embroidered creations.
Thursday, September 4, 2008
Embroidered Patches
Embroidering on Pre-made patches is much easier than you might have thought. Pre-cut blank patches are readily available. While patches can be purchased with a heat seal backing, they can be more of a challenge to embroider on. The heat seal backing can cause your needles and hook assembly to be gummed up causing tension problems. You can add a heat seal backing or peel and stick backing after you finish embroidering the patch.
You can use the repeat key on you embroidery machine to enter in the dimensions from center to center of your patches in both the X and Y directions. This will make sure that you matches will you uniform and further automate the process.
Patch Frames
Patch Holder Attachments for Embroidery Machines allow for the simultaneous attachment of up to 12 separate patches within the same frame, eliminating the need for constant interruption of labor and increasing the productivity of your workforce.
The patches are held in place by spring loaded frames that hold the patches in place firmly without leaving marks. Patch holders are made to any size, shape and for any machine. This handy product will increase your quality, productivity and profit.
Adhesive Backing
An alternative to patch frames is to use peel and stich adhesive cut-away backing within either your border frame or you largest hoop. Use you copy and repeat function on you machine keyboad as you would with a patch frame. After you run you first set of patches trace the patches on the backing and then carefully cut around the embroidery to remove the patches while keeping the backing in the frame. You now have a patch frame holder which can be used over and over. You might want to slip a piece of tear-away backing underneath and replace it for every run.
There are not many companies out there that offer low volume patch orders, using either of these techniques will allow you to easily take advantage of this luctritive niche market.
Planning Work Flow
Simple preparation is often all you need to turn a potentially negative situation into a positive one. Every year at this time, we receive last minute orders for personalized embroidered items. To avoid the rush this year, you need to put yourself in the forefront of your prospective customers' minds before they start planning for the gift-giving season.
Review your records and track the business flow from the previous year. Determine which times were the busiest, and plan on hiring extra help during those times. It is important to factor in the training period for new or temporary workers, as they can only begin being productive once they know what they are expected to do.
The best approach to a busy season is to take a proactive stance and control the workflow. One method of doing this is to offer you customers an incentive to order early. A discount for ordering early or an up-charge for last minute orders might be all they need to place their orders early. A catalog is another way to stimulate interest and get you customer thinking about their holiday needs. Another idea for generating orders early is to host a holiday home shopping party. Assemble samples of embroidered holiday related garments to peruse. Remember keep it simple Limit you inventory choices and choice of designs and colors. You want to spend their time ordering, not deciding what to buy.
Of course these are just some ideas for controlling your shop's productivity during a rush season. Throughout the year you will experience both slow and busy periods. If you identify these trends and take action to control them you can keep you shop running smoothly all year. We all think that being busy is a good thing, but if you can stretch that busy season into a slow one you can reduce stress in both slow and busy times.
Wednesday, July 30, 2008
Adding Texture
The practice of using puffy foam underneath satin or column sitiches to create a 3-D look to parts of your embroidery has been very popular on and off for the past at least ten years but this method of creating raised areas of your design becomes totally impractical if the garment upon which the embroidery is being placed is to be dry cleaned. The dry cleaning solution wil dissolve the foam and leave you with merely a very, very loose satin stitch. Another method to consider is to first digitize a skinny column stitch in the center of the final column stitch at full density. Then follow that with a slightly wider column stitch on top of that but still inside you final column stitch width and then finally finish that with your finished and top column stitch. Because none of your needle pentrations are in the same place you will not experience thread breaks, and you will end up with a significantly raised column stitch, which can serve as the focal point of your design. For example if you are digitizing a bouquet of roses and you want some of them to appear to more in the foreground use this underlay technique in varying degrees underneath the column stitches that make up those flowers. One row of underlay stitches under the roses you want in the mid-ground and two rows under the ones in the foreground and none under the ones you want to appear in the background. Try it it works. Good luck.
Wednesday, July 23, 2008
Becoming A Commercial Embroiderer
The only real difference between commercial embroidery and home embroidery is the fact that commercial embroidery is made to be sold. You may not think that this is a big difference, but it truly is. When you are embroidering as a career, you are creating for someone else and when you are finished, the embroidery is theirs. You can lose minutes, or even hours, of time contemplating the infinite designs, techniques and uses embroidery affords, and this is the fun and exciting aspect of embroidery if you are creating for pure enjoyment. It is the danger if you are trying to make a living. This is the quandary - to put enough of your-self into your work to make it exciting, but not so much that you get lost in it. This is just one of the ongoing creative battles you will have with yourself. The other is to design for your customers and not yourself. There is difference between quality and taste. When you are embroidering for sale you must always create a quality product, but it doesn't necessarily have to be designed to suit your own taste. If you can remember to keep your customer's needs at the forefront of your design decisions, you will stay on the right track. Additionally, a new factor is introduced that is called a profit. If you don't make a profit, you really aren't in business. To ensure a profit you have to make sure that you charge more than the embroidery costs to make. One tactic is to find the right customer. Everything is relative, so a price that is exorbitant to one can be reasonable and fair to another. Take something as simple as an embroidered pillow. As an embroiderer you can offer something uniquely designed to not just coordinate with a room, but to actually act as a design force to tie together disparate portions of the design. This way your custom embroidered accessory becomes an indispensable part of the room as well as being a bargain at any price. Another way to lower costs is to design with cost reduction in mind. You can lower embroidery time by reducing stitch count and by replacing large filled-in areas with applique. You can also reduce design time by incorporating stock designs rather than digitizing your own unique designs for every product. What embroidery can achieve - whether it is enjoyed as a hobby or as a business - is to produce something totally original, essentially from nothing. The only things you need are skill and imagination, and if you posses these two gifts you can satisfy the needs of even the most discriminating customer. Add to this the ability to scale back your projects to fit within a budget and you will corner the market.
Fashion embroidery requires a very different sensibility than most other types of commercial embroidery. When we create logoed embroidery we are bound by a long list of absolutes. The colors, design and in many cases, even the stitch types are already predetermined for us, and all we have to do is reproduce the design in embroidery. When we create fashion embroidery, however, we usually start with a much less finite point of departure. We might start with a pre-assembled garment in need of a little more personality, or a garment screaming to be monogrammed, or even a bolt of fabric waiting to be transformed into that absolutely perfect and unique outfit. All of these starting points offer many more options and, at the same time, many more decisions. I feel that the most important place to start is with the motivation for using embroidery.
The Embroidered Design
Embroidery can be used to create a focal point on a garment, or it can be used to lend both interest and texture in a much more subtle application. Depending on which of these effects you wish to achieve, your approach will differ. To create a focal point, your color palette would probably be bold and contrast with the base fabric of your garment. If you choose the more subtle approach, your color choices would probably contain different values of the same color family, or a collection of pastels on lighter fabrics, or rich colors on dark fabrics. Another choice to be made is the overall shape of your embroidered design. This step is probably the one that is most often ignored in the design process. Thumbing through a stock design catalog, you will probably notice that many of the available designs are created with overall square, rectangular, round or oval shapes, as this makes it very easy to personalize them by adding lettering. These designs can, however, be difficult to use in fashion embroidery and can give your end product a generic look. Using your editing tools to remove either the border or background of the stock design, thus giving it a much more natural and irregular shape, can often solve this problem. Irregular shapes allow the design to blend more seamlessly with the garment, as opposed to more geometric and regular shapes.
Density
Another underexplored element crucial to successful fashion embroidery is density. When creating garments, especially those made of knits and lighter fabrics, the drape of the fabric is very important. If the stitch density within your embroidered design is too heavy, it can interfere with this drape and ruin the lines of the garment. When working with lighter fabrics, it is often better to rely on underlay to make your stitching more opaque rather than increasing your density.
Picking the right designs, colors, placement and configuration makes embroidery fit as an indispensable and integral design element.
Wednesday, July 16, 2008
Assessing Your Productivity
No matter how streamlined your embroidery shop is, there is always room for improvement. Different production methods are worth exploring due to the new and different products and processes that are constantly surfacing. All of them will require different solutions at one time or another. So, as the work we produce becomes more diversified, we need to re-evaluate how we can best use our facilities.When we talk about production, we usually start with machine speed, stitch counts and the amount of shifts necessary to complete a job. We start here because these three aspects are the basics for determining the time frame necessary to complete an order.There are, however, other variables which should be considered in the process. Some of these include shop layout, operator’s workload, even the amount of jumps and color changes in a design, but the list is really endless. Every aspect of your business, no matter how inconsequential it may seem, affects productivity. Therefore, on a regular basis, it is a good idea to sit back and take a fresh look at your embroidery operation. This doesn’t mean it is necessary to make regular changes to your embroidery operation. If, upon close inspection of your plant, you find no changes are needed, that is gratifying too.The important lesson to be learned is the necessity of objectively assessing your current processes. Once you are able to look at everything with fresh eyes, you can logically assess all your practices and eliminate those that are either redundant or have simply become obsolete.
Tuesday, July 15, 2008
Embroidery Supplies
The secret of perfect embroidery is based on an attractive design and the right thread colors. True perfection, however involves much more than what is seen on the surface; it also depends upon the optimal combination of fabric, needle, thread and backing, as well as the ideal registration of the embroidery machine. Selecting the right supplies for your next job will be much easier if you have a clear idea of the properties of these essential products.ThreadsThere are a number of first-rate suppliers of embroidery materials around the world. These companies offer a variety of threads made of different fibres, such as Rayon, cotton, wool, polyester, polypropylene, nylon and acrylic. Regardless of your needs--whether your embroidery calls for thread resistant to abrasion, chlorine or even fading--chances are you will find exactly what you need. Rayon thread, one of the most popular, is known for its softness and sheen. It is an ideal choice for embroidering ladies, men's and children's wear, as well as trendy sportswear. But, despite Rayon's qualities, this thread is not suitable for every application. For instance, it is not recommended for blue jeans, basic sportswear or work clothes that undergo industrial laundry conditions or the addition of chlorine to the wash. For these items, polyester thread would be the better choice. If your goal is to achieve an exclusively natural look, cotton and woolen embroidery yarns are an excellent choice. Cotton threads, in particular, are very attractive when used to embellish country dècor or fashion. Woolen threads, on the other hand, have a duller visual aspect that makes them more compatible with wool, knitwear and linens. For those special projects that call for a distinctly different thread, today's digitizers/designers have technology to thank for providing them with an exciting collection of novelty threads, including both metallic and light-reactive threads. With such unique products on the market, the doors to artistic expression are wide open. The one caveat that applies to these threads is that they are not usually chlorine or abrasion-resistant, so if these criteria are of importance, polyester thread should be used instead.
Backings
When creating beautiful embroidery, choosing the right backing is every bit as critical as choosing the right thread. For non-stretch materials, it is possible to use a non-woven backing without coating, while, for stretch materials, a non-woven with coating is preferred. Therefore, non-woven fabrics with coating may always be used, but their handling is more complicated and they are more expensive. It makes good sense to have a selection of white non-woven backings for sheer fabrics and black/anthracite ones for dark fabrics. Although non-woven backings are removed after the embroidery process, there might be remainders on the fabric itself, and this can have an unprofessional effect. If embroidery companies want to avoid the inconvenience of having a huge inventory of different quality non-woven backings, they should purchase non-wovens, as needed, for each order. When trying to determine the appropriate weight of backing to buy, the decisive factor is the fabric on which the non-woven backing is to be used. The rule is simple: The heavier the non-woven, the more suitable it is for heavier materials. While on the subject of backings, another product that deserves mentioning is self-adhesive backing. In addition to providing excellent stability, this product eliminates the need for hooping, making it the perfect backing for certain situations.
Bobbins & Needles
Provided the tension on your machine is correctly regulated, bobbin thread should not appear on the right side of your embroidery. For this reason, it is not a major issue whether you use black or white thread; although, in general, it is recommended that you use a black-coloured bobbin thread for dark colours. Bobbin thread on the cone is less expensive (because someone must wind the bobbins), but, for embroidery purposes, the pre-wound variety is often preferable because its delivery is smoother.
It is common knowledge that better-quality embroidery needles result in greater productivity and a higher quality of embroidery. The embroidery needle system (DB x K5) developed by Organ Needle offers some great advantages compared to the former system (287WK). Benefits include an easier and softer thread passage, less missed stitches and higher strength. Embroidery needles with a medium ball point (SES) have the advantage that not only light fabrics, but also heavy basic fabrics, are pricked softly. Very good embroidery results can be achieved with woven fabrics and knitwear, as well as with thin leather. The needle count, or strength, is determined by the dimension of the long groove and the needle eye. A new development in needles is the DB x K5 Innova Duo system developed by Lammertz Germany with an additional groove on the furrow side, which leads to even better running properties of thethread. The new embroidery needle system is recommended for difficult embroidery designs on difficult materials, especially, when using extremely long satin stitches, or for embroidery designs with high densities.
More Useful Products
Any discussion about embroidery supplies should include temporary adhesive sprays. This useful product is one of the most important aids for embroidering large surfaces, or for using with appliquès or emblems. The decisive criterion for temporary adhesives is, of course, the gluing property. The adhesive strength should last for approximately one day, yet be easy enough to remove after sewing. Furthermore, the glue should not gum up the embroidery needles. Embroiderers looking for a way to make their designs even more expressive will have already explored the use of appliquès. The availability of materials suitable for appliquè is huge. One popular fabric is permanently coated twill, which produces quality monograms and is also suitable for embroidering logos, badges and emblems. There are so many amazing embroidery products in today's market that embroiderers will find it easier than ever to produce truly unique, beautiful embroidery. It's all a question of exploring the wealth of products out there and experimenting with them.
Men's Fashion Embroidery
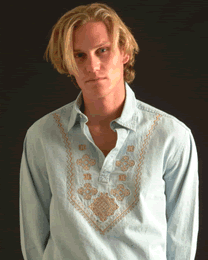
Embroidery is everywhere. Blouses, shirts, trousers, skirts, jackets and shoes all sport some type of embroidery. Another exciting trend is the combination of tie-dye and screenprinting with embroidery, which offers a very fresh, new look.Embroidery is popular because it is readily available, but also because designers have found ways of making it look anything but traditional. This has made it not just popular, but on the cutting edge and very desirable.Embroidery is once again hot, especially in the new men’s wear lines. Textures derived from a variety of different threads, tropical patterns, geometrics, hand-driven run and chain stitches are used together or separately to form totally new looks.In examining some of the fashion embroidery shops around the globe, we notice some very obvious facts. Most fashion embroidery is produced flat on either pre-cut pieces or on flat goods, which are cut later. Lasers have been added to many of the production rooms for various purposes: to cut individual pieces, cut designs in garment sections, create decorative borders or etch the surfaces of fabrics.As for the new men’s wear fabrics, we see natural fibres used with both ethnic-inspired and bold graphic designs, but we also see new synthetic fibres in sheer and opaque forms paired with anything from cross-stitch to multi-layered appliquéd fabrics and trims.This is a very exciting time for men’s wear because of the continued rise of the casual and corporate casual sectors. At the forefront of all of this is embroidery. Designer’s needs are fuelling expansion of embroidery shops, which is increasing the size of our overall global industry.
Monday, June 2, 2008
Deduct The Cost Of Your Embroidery Machine
Introduction
You can elect to recover all or part of the cost of certain qualifying property, up to a limit, by deducting it in the year you place the property in service. This is the section 179 deduction. You can elect the section 179 deduction instead of recovering the cost by taking depreciation deductions.
Estates and trusts cannot elect the section 179 deduction.
This chapter explains what property does and does not qualify for the section 179 deduction, what limits apply to the deduction (including special rules for partnerships and corporations), and how to elect it. It also explains when and how to recapture the deduction.
Useful Items - You may want to see:
Publication
537 Installment Sales
544 Sales and Other Dispositions of Assets
954 Tax Incentives for Distressed Communities
Form (and Instructions)
4562 Depreciation and Amortization
4797 Sales of Business Property
See chapter 6 for information about getting publications and forms.
What Property Qualifies?
Terms you may need to know (see Glossary):
Adjusted basis
Basis
Class life
Structural components
Tangible property
To qualify for the section 179 deduction, your property must meet all the following requirements.
It must be eligible property.
It must be acquired for business use.
It must have been acquired by purchase.
It must not be property described later under What Property Does Not Qualify.
The following discussions provide information about these requirements and exceptions.
Eligible Property
To qualify for the section 179 deduction, your property must be one of the following types of depreciable property.
Tangible personal property.
Other tangible property (except buildings and their structural components) used as:
An integral part of manufacturing, production, or extraction or of furnishing transportation, communications, electricity, gas, water, or sewage disposal services,
A research facility used in connection with any of the activities in (a) above, or
A facility used in connection with any of the activities in (a) for the bulk storage of fungible commodities.
Single purpose agricultural (livestock) or horticultural structures. See chapter 7 of Publication 225 for definitions and information regarding the use requirements that apply to these structures.
Storage facilities (except buildings and their structural components) used in connection with distributing petroleum or any primary product of petroleum.
Off-the-shelf computer software.
Tangible personal property. Tangible personal property is any tangible property that is not real property. It includes the following property.
Machinery and equipment.
Property contained in or attached to a building (other than structural components), such as refrigerators, grocery store counters, office equipment, printing presses, testing equipment, and signs.
Gasoline storage tanks and pumps at retail service stations.
Livestock, including horses, cattle, hogs, sheep, goats, and mink and other furbearing animals.
The treatment of property as tangible personal property for the section 179 deduction is not controlled by its treatment under local law. For example, property may not be tangible personal property for the deduction even if treated so under local law, and some property (such as fixtures) may be tangible personal property for the deduction even if treated as real property under local law.
Off-the-shelf computer software. Off-the-shelf computer software placed in service during the tax year is qualifying property for purposes of the section 179 deduction. This is computer software that is readily available for purchase by the general public, is subject to a nonexclusive license, and has not been substantially modified. It includes any program designed to cause a computer to perform a desired function. However, a database or similar item is not considered computer software unless it is in the public domain and is incidental to the operation of otherwise qualifying software.
Property Acquired for Business Use
To qualify for the section 179 deduction, your property must have been acquired for use in your trade or business. Property you acquire only for the production of income, such as investment property, rental property (if renting property is not your trade or business), and property that produces royalties, does not qualify.
Wednesday, May 21, 2008
Embroidery Sales Basics
For many embroiderers, the most daunting task is actually meeting with prospective customers, introducing yourself and your company’s services. However calling on customers is only intimidating if you are not prepared. In order to get ready to hit the ground running you might want to run through the checklist below and make sure that you have done your homework.
Are you a good listener?
Are you prepared to spend as much time listening to needs of your customer as you are prepared to talk to them?
Along with speaking, a great salesperson knows when to stop talking and listen. They never cut someone off while they are talking; you need to identify your customer’s needs before you can satisfy them.
Can you follow their lead?
Salespeople should be naturally inquisitive. As the saying goes “You don’t know until you ask?” The only way to know how best to serve you customer is to identify their needs.
Can you identify a problem?
The service of embroidery is really providing a solution to a problem. Great salespeople are always solving problems. The ability to hone in on what the buyer's problem is and offering a multitude of suggestions that will diminish the odds of losing the sale. Be positive and be creative.
Are you well organized?
By well organized, I mean in terms of you thoughts. Can you break things down into smaller steps and attack them on at a time. The largest of problems can be solved I a series of small simple steps.
Can you motivate yourself to get started?
Often starting the sales process is the most difficult step, from there it is all downhill. Don’t fail before you even begin.
Can you think positive?
Sales is all about attitude. If you start out negative it will become a self-fulfilling prophesy. Stay positive, if you think you are going to make a sale you will.
Can you put yourself in your customer’s shoes?
Try to empathize with you customers, understand the way the think and always respect their viewpoint.
Can you be trusted?
Honesty truly is the best policy. If you don’t know an answer to a question, find out. Don’t wing it, that gives you a fifty percent chance of being wrong. Telling the truth is the best way to illicit your customers trust and confidence.
As an embroider you are the expert, let your customer know that and also let them know that you love what you do. This is the best way to develop a long lasting partnership with all of your customers.
Friday, May 9, 2008
Sash Frame
When you are embroidering on linens or other flat items you can take advantage of the increased embroidery area afforded by switching to a sash frame also referred to as a border frame. A border frame increases your embroidery area from 15.7" x 17.7" to 16" x 19", which is a substantial increase. If you embroidering on a multi-head machine this device allows you to embroider a continual pattern by alternating the heads. You can sew one half the pattern with every other head and then the other half of the design on the other heads. This essentaily doubles the size of design that you can embroider. This feature is great for fashion embroidery and home decor items such as draperies, linens, slipcovers and valances, where larger continuous designs are often required. To view all of the details of this option go to http://www.ricoma.us/machine2.cfm
Thursday, May 8, 2008
Placement Guidelines
Embroidery Placement Chart
Especially when you are getting started in embroidery, the simplest thing can seem huge if you don't know where to go to find the answer. To help reduce the learning curve in one area I put together this listing of embroidery placement guidelines. These are just guidelines, depending on the various sizes of certain garments you might want to adjust them for extremely large or small sizes.
Aprons Centered on Bib 4” from top
Bath Wrap 2” from top and 2” from front opening
Blankets On a 45 degree angle 10” from corner
Coat lining Either Centered under the pocket
Or the center of the embroidery
Should be 4” from front seam
Child’s Bib Centered top to bottom left to right
Napkin on 45 degree angle 3” from corner
Necktie Centered 2” from bottom
Pillowcase Centered on wide hem
Pillow Sham Centered left to right top to bottom
Sheets Upside down centered 2” below hem
Shirts Tee left chest 8” from shoulder 4” from center
Shirts Polo 8” from shoulder 3.75” from placket
Shirt Polo Sleeve Centered .5” above band
Shirts Dress left chest 8” from shoulder 3.75 from buttonhole
Shirts Dress above pocket .25” above pocket centered
Shirts Dress cuff 1.375” from center towards buttonhole
.25” from hem seam
Shirts Sweat left chest 8” from shoulder 4” from center
Shirt Turtleneck upside down between the center of the
Neck and the left shoulder seam .5” from edge
Shorts Centered between the center of the left leg and side seam
.5” above the hem
Towel Wash cloth 1.5” above hem or 1” above border
Towel Fingertip 1.5” above hem or 1” above border
Towel Hand 2” above hem or 1.5” above border
Towel Bath 4” above hem or 2” above border
Towel Bath Sheet 5” above hem or 3” above border
Towel Golf centered below grommet
Luxurious Linens
Did you ever smell an aroma or hear a song or even glace at a photograph and find yourself transported to another time and place? Our minds allow us to do this instinctively and uncontrollably. Great designers create this same type of instinctual response with their work. Those who do this well create a hunger for their work in the consumer arena. Many times we talk about the importance of customer service as a means of developing brand loyalty, but the true meat and potatoes of consumer desire is great design. It will always win out in the end.This month we are honing in on the linen market, and linens of any kind are big business right now. It seems, however, that interest is especially strong in luxury linens. This is great for embroiderers because embroidery tops the list of upscale embellishments.While luxury fabrics are important, in an effort to differentiate themselves, many designers are turning to embroidery for that very special touch that sets their designs apart from the competition’s. Embroidery as a process allows the designer to add texture, a unique colour palette and a virtually unlimited amount of patterns. Embroidery can impart traditional or extremely modern design themes, as well as anything in between. It can also be incredibly intricate or the height of simplicity, depending upon the impact or feeling you are trying to impart. Within the area of embroidery you also have optional treatments such as appliqué, cutwork, cording and boring, along with many others, and combinations of techniques to further emphasize the textural aspects of your designs.
Using a border frame to hoop these large items accomplishes three important things: It increases the size of your embroidery field, it make it easier to hopp more accurately, and if you are embroidering on a multi-head machine allows to to embroider a continuous design without re-hooping.
Get your inspiration from everything around you. go shopping in person or on-line, take a look at wallpaper borders and fabrics, start designing and digitizing, and producing, your customers are everywhere and looking for something new and unique. To add an even more special touch leave a space for a monogram to be added later at the point of sale.
Use these designs and techniques as a departure point and take them even further by imprinting them with your own unique style and vision.
Wednesday, May 7, 2008
The Thread You Use Changes the Laundering Instructions of The Garment
After you embroider a garment you should remember that the thread that you used has changed the laundering needs of the garment that you have embroidered. I have listed below the instructions for garments which have been embroidered with metallic, polyester and rayon theads.
Metallic Embroidery Threads
Washing Instructions:Embroidered articles or garments should be washed with a neutral detergent in cold or lukewarm water. Immediately after washing, rinse the embroidery in cold water thoroughly.Avoid using chlorine bleach or optical brightening agents or heavy detergents which may cause discoloration.Wash embroideries separately from other laundry and do not crowd them into washing machine. Do not wring out or rub briskly. After washing, dry the embroidery immediately. Never leave embroidered items soaking in water or folded or piled together when wet. When stain removers are to be used, it is suggested that a small experimental evaluation be conducted in advance to make sure that the stain remover dose not affect colors adversely. Embroidery is dry cleanable with petroleum only.
Ironing Instructions:All embroidered items should always be ironed on the reverse side, at a low temperature setting, and most preferably between two pieces of cloth.
Usage Instructions:It is recommended that thread from the same dye lot is used on symmetrical panels that require all identical colour combination. If no thread of the same dye lot is available, it is advisable to run, for evaluation, threads of different dye lots on a sample piece of material before sewing on a garment.
Storage Instructions:Do not dispose the thread to sunlight or artificial light for extended periods. Keep the thread in a well-ventilated area, avoiding high-temperature and high-humidity conditions under which to stock and work. Never get the thread in direct contact with such materials or goods which contain sulfide as rubber. Also keep it away from area with airborne contaminations, specially with area with gas stoves which tend to emit sulfur acid gas. Care Instructions for Embroidered Garments with rayon thread.
1. HOME LAUNDERING
All embroidered garments should be washed with a mild detergent Do not use chlorine bleach or optical brightening agents If bleach is required for washing, use non-chlorine bleach in accordance with product instructions Machine wash cold water Delicate wash cycle If color residue appears in water, rinse first in lukewarm water and then cold several times until rinse water becomes clear Remove promptly after wash cycle completion Never leave any piece of embroidered clothing soaking or in water or lying in a pile when wet Upon completion of washing cycle place articles immediately in dryer, use normal setting. (For best results, we recommend preheating the dryer.) Do not wring out the embroidered articles Do not rub stained embroidery 2. DRY CLEANINGEmbroidery may be dry cleaned, however, extreme care should be excercised when dry cleaning. Special care must be taken when dark shades are dry cleaned. Avoid use of pre-spotting agents.
3. INDUSTRIAL LAUNDERINGGarments that are embroidered with Super Strength™ Rayon, Twister Tweed Rayon, or 600 Denier Rayon can be industrially laundered when proper procedures are followed as outlined by the International Fabricare Institute. Please call or fax for details. Embroidery may be dry cleaned, however, extreme care should be excercised when dry cleaning. Special care must be taken when dark shades are dry cleaned. Avoid use of pre-spotting agents.
4. IRONINGEmbroidered fabrics should always be ironed on the reverse side It is recommended to iron embroidery between two pieces of cloth It is not recommended to wet embroidery prior to ironing or to use a steam iron Note: Normally the care label instructions pertain to the garment, not the embroidery. Special care should be taken when laundering embroidered garments.Since the conditions of use, washing, pressing and cleaning, etc. vary in use of yarns and threads, the purchaser should assure himself by preliminary tests that the dye fastness of the yarn or thread is 100% colorfast to crocking or washing under all conditions. Care Instructions for Embroidered Garments withPolyester Threads
1. HOME LAUNDERINGAll embroidered garments should be washed with a mild detergent If bleach is required for washing, a small amount of chlorine bleach can be used. Non-chlorine bleach in accordance with product instructions is preferable Machine wash cold water Delicate wash cycle If color residue appears in water, rinse first in lukewarm water and then cold several times until rinse water becomes clear Remove promptly after wash cycle completion Never leave any piece of embroidered clothing soaking or in water or lying in a pile when wet Do not wring out the embroidered articles Do not rub stained embroidery
2. DRY CLEANINGEmbroidery may be dry cleaned, however, extreme care should be excercised when dry cleaning. Special care must be taken when dark shades are dry cleaned. Avoid use of pre-spotting agents.
3. INDUSTRIAL LAUNDERINGGarments that are embroidered with polyester thread can be industrial laundered when proper procedures are followed as outlined by the International Fabricare Institute. Please call or fax for details. Embroidery may be dry cleaned, however, extreme care should be excercised when dry cleaning. Special care must be taken when dark shades are dry cleaned. Avoid use of pre-spotting agents.
4. IRONINGEmbroidered fabrics should always be ironed on the reverse side It is recommended to iron embroidery between two pieces of cloth It is not recommended to wet embroidery prior to ironing or to use a steam iron Note: Normally the care label instructions pertain to the garment, not the embroidery. Special care should be taken when laundering embroidered garments.Since the conditions of use, washing, pressing and cleaning, etc. vary in use of yarns and threads, the purchaser should assure himself by preliminary tests that the dye fastness of the yarn or thread is 100% colorfast to washing under all conditions.
Care Instructions for Embroidered Garments withMetallic Threads
All embroidered garments should be washed with a mild detergent Note: Normally the care label instructions pertain to the garment, not the embroidery. Special care should be taken when laundering embroidered garments.Since the conditions of use, washing, pressing and cleaning, etc. vary in use of yarns and threads, the purchaser should assure himself by preliminary tests that the dye fastness of the yarn or thread is 100% colorfast to washing under all conditions.
Tuesday, May 6, 2008
The Basics of Embroidery Design Creation
When you are converting artwork to embroidery, whether you are using an auto-digitizing program or a more manual method it is really a two step process, whether the two steps are obvious or not.
The first step ( if you're not starting out with a vector image) is the conversion from a bitmap image to a vector image.
The next step is to fill those vectors with different stitch types, densities and angles. There are varying degrees of how automatic or manual you want to make this process, depending upon how much control you wish to maintain over the details of the final outcome.
If you creating a fairly flat logo design, with no textures and you are starting out with clear precise artwork you might choose to use the auto-digitizing method. After this process is complete, if you are not satisfied you can then go back and fine-tune the results by using your editing tools.
If you are starting out with a vector image you can choose to fill in the entire design with stitching or you can choose the individual elements that make up the design and fill them in one by one. The advantage to this method is that you can control which stich types and directions will be employed from the very beginining.
The last choice is to start with a bitmap image and create you objects and then immediately fill them in with stitching. This will allow you to alter their shape, density, stitch type and stitching order as you create your design, while this is the most time intensive, it also gives you the most control.
Monday, May 5, 2008
Applique Appeal
The incorporation of appliques within a design has always been a great technique for reducing stitch count and embroidery machine run time. However there are times when it is in fashion and others where it popularity wanes a lttle bit. Right now these are quite a few factors that have caused its popularity to soar.
First of all Laser cutters, both independent and beam lasers which work directly on the machine have sped up the process and made it much more automated.
The wide availablity of applique fabrics and cutting services and lower minimums have made apllque easily available to every embroiderer.
The availablily of knowledge of the technique, through magazines, websites and from manufacturers has make the process much less daunting.
There is also the comfort factor. Many customers find appliques designs more comfortable to wear than designs that are solely embroidered.
There is also sophisticated software offerered to automate the digitizing of appliques and to generate cut lines for laser or other cutting machines.
Last, it is in fashion right now so customers are asking for it. So, if you haven't offered applique up to this point now might be the ideal time.
Monday, April 21, 2008
The auto-trace feature in D.I.S.C. Gold digitizing, editing and lettering program allows you to automatically trace any scanned image and simultaniously reduce the colors necessary to reproduce that image in embroidery. This function frees up you time so that you can focus in on the more creative aspects of embroidery creation, such as density, stitch direction and type.
Wednesday, April 16, 2008
D.I.S.C. Gold Version 3.2
Capped Corner
Overlapped Corner
Mitered Corner
Overlapped Corner
Mitered Corner
Standard Corner
D.I.S.C. Gold Version 3.2 is a full digitizing software that combines Digitizing, Editing, Lettering, Designs Management and many other features in a complete user friendly environment.
it allows you to automatically digitize vector images or to manually digitize your own designs, and has all of the features of all of the major professional digitizing programs at a fraction of the price.
One of those features is a choice of cornering options.
When you are digitizing a column stitch and you have to turn it at an accute angle you can run into a couple of problems. One is a build up of stitches on he inside of the angle, which can cause both thread breaks and actually bore a hole in the garment. The other is extremely long stitches which will look unsightly and also tend to get caught and break. To solve these problems we give you four different cornering options. The four cornering options illustrated above are: standard, mitered, capped and overlapping. While the standard cornering option is usually the preferable choice, you will run into situations where you will need to opt for one of the other choices.
Monday, April 14, 2008
Understanding Embroidery Profitabilty
Retail / Home Production Cost Analysis
How Much Money Can You Earn With a Ricoma?
While there are other factors which may come into play when you start your business and pick the market niche you wish to serve, below we have outlined the basic formula for calculating you daily embroidery profit.
Number of Heads
Cost
1 2 4 6
1 Day Labor ($9.00/hr. x 8 hours)
$72.00 $72.00 $72.00 $72.00
Average machine cost with software
$12,500 $18,500 $26,500 $35,500
Monthly Payment (60 months @ 10%)
$266 $393 $563 $755
Daily Payment (Monthly payment / 30 Days)
$12.09 $17.86 $25.59 $34.31
Daily Labor + Machine Payment
$84.09 $89.86 $97.59 $106.31
Production
1 2 4 6
Time it takes to sew an average design. (6,000 stitch pattern 3-colors @ 700 stitches per minute) The average corporate logo will be about 3000-5000 stitches. Top machine speed is usually 1200 stitches per minute. Time is allotted for re-loading the garment onto the machine and the extra time it takes for the machine to trim the thread and change colors.
9.6 min 10.1 min 10.6 min 11.1 min
Results
1 2 4 6
Total items produced in one day. (420 minutes (7 hours) divided by time for 1 item)
43.75 83.16 158.48 227.00
Production Cost/Item (One days operation cost divided by items produced, including .04 per item for thread & backing)
$1.96 $1.12 $0.65 $0.50
Retail Pricing
1 2 4 6
Total items produced in one day. (420 minutes (7 hours) divided by time for 1 item)
43.75 83.16 158.48 227.00
Production Cost/Item (One days operation cost divided by items produced, including .04 per item for thread & backing)
$1.96 $1.12 $0.65 $0.50
Retail Pricing
1 2 4 6
Embroidery Profit (6000 stitches x .80 per 1000 x daily production less production cost) Retail pricing will vary depending on location and customer. We took a good average of this criteria and came up with .80 per 1000 stitches.
$124.25 $306.02 $657.69 $976.10
Total Daily Profit
1 2 4 6
HatsCost = $3Retail = $13Profit = $10 + Embroidery.
$554 $1,136 $2,237 $3,246
$554 $1,136 $2,237 $3,246
Polo ShirtsCost = $8Retail = $24Profit = $16 + Embroidery.
$812 $1,634 $3,185 $4,608
$812 $1,634 $3,185 $4,608
JacketsCost = $28Retail = $55Profit = $27 + Embroidery.
$1,285 $2,547 $4,923 $7,105
Note: Above garment profits will be reduced for large orders and/or to compete with other embroiderers.
Mark these ideas on your calendar today, and all year long you will get a head start on your monthly promotions.
January - White sale, ski equipment, sweaters, turtlenecks, winter wear
February - Washington’s Birthday, Lincoln’s Birthday, Valentine’s Day
March - St. Patrick’s Day, Easter wear, baby items
April - Luggage promotion, canvas tote bags, team uniforms, school fund Raisers.
May - Mother’s Day, robes, aprons
June - Graduation, wedding, Father’s Day (men’s shirt and tie Monogramming)
July - Beach wear, towels, terry robes
August - Back-to-school, totes, backs packs, school jackets, baseball hats
September - School and church fund raisers
October - Halloween
November - Linens for Thanksgiving and the Holidays
December - Time to have customers thinking about Christmas gifts
All Year Long
Corporate Accounts - Product launches, promotional itemsLocal Businesses - Employee work wearSports Teams - Team strips, Baseball caps, Merchandising items
Thursday, April 3, 2008
How To Speak Embroiderese
You have started an embroidery business, your machine has been installed, you have learned the basics of your software, you open your doors and you are ready to go.
However, are you ready to competently explain your offerings? There is sometimes a language barrier when communicating with your customer, in both understanding and using the proper embroidery terms. In an effort to help you jump over this common hurdle we have published a glossary of embroidery terms on our website at http://www.ricoma.us/embroidery_glossary.cfm
So before you rush in and conquer you might want to scan this very helpful list of terms so you can go out swinging fully prepared for any situation.
Wednesday, April 2, 2008
Chenille is a specialized sector of the embroidery industry, and as such can be much more profitable than standard embroidery. Corporations, schools, teams, fashion designers, organizations, fraternities, sororities, clubs, individuals, movie studios, Grand Prix and Motorcross, pop and country music stars, and sporting goods team dealers all use chenille embroidery and the demands are greater than the services available. Whether you are an embroiderer who is ready to expand their business or a screenprinter or ad specialty distributor who feels it is time to bring chenille embroidery in-house, we have the perfect model for you. Feel free to visit our website http://www.ricoma.us/ or to contact one of our highly trained salespersons so we may answer any questions regarding our multi-function technology. And again, don’t forget to ask about our special lease programs available now and take advantage of the lowest interest rates in history!!!
FC1201-SQ-6L
This unique multi-function model will give you the ability to create 12 color standard embroidery combined with 6 color chenille at an incredibly affordable price. Sleek design and finish with state of the art features and technology.
Special Multi-function Chenille FC1201-SQ-6L
12 Color standard embroidery
6 color Chenille
Sequin
Flat and Tubular sewing
12 Color standard embroidery
6 color Chenille
Sequin
Flat and Tubular sewing
Friday, March 21, 2008
RiCOMA Spring Sale-A-Bration
RiCOMA USA is offering huge savings on all of our newly redesigned and engineered embroidery models from now until the end of April 2008. Get the latest technology at the greatest savings ever. Listed below you will find just some of the incredible packages we are offering in this unparalleled sales event. Feel free to visit our website http://www.ricoma.us/ or to contact one of our highly trained salespersons so we may answer any questions regarding our Spring Sale-a-bration. And don’t forget to ask about our special lease programs available now and take advantage of the lowest interest rates in history!!!
RCM1204C
This totally redesigned and engineered machine will give you the ability to maximize production at an affordable price. Sleek new design and finish with state of the art features and technology.
*Spring Sale A Bration Savings Special Price $25,995.00*
RCM1204C
DISC Gold Digitizing Software
Complete set of Hoops
Cap Driver and Cap Frame
5 Year Warranty
RCM1208C
This totally redesigned and engineered machine is lighter and more efficient, with the capacity to work all day and all night.
*Spring Sale-a-bration Savings Special Price $35,995.00*
RCM1208C
DISC Gold Digitizing Software
Complete set of Hoops
Cap Driver and Cap Frame
5 Year Warranty
*Also ask us how to start your own Embroidery Business for under $10,000.00
*Call or email us for more information on our many other Spring Sale-a-bration Specials
Prices are valid as of 03/15/2008 thru 03/31/2008
Write us at info@ricoma.us or visit our website
http://www.ricoma.us/ or call 1-888-292-6282
Copyright © 2008 Ricoma All rights reserved
Thursday, March 20, 2008
Add Three-Dimensional Texture
One of the most desirable aspects of embroidery is its tactile appeal. When you look at an embroidered design, it is almost impossible not to run your fingers across it and appreciate the textural qualities imparted by the thread. To increase this effect we add layers of underlay to emphasize these qualitites. Puffy foam is also used to create a similar appeal.
What is often overlooked is the incredibly quick and easy 3-D looks you can achieve with the addition of cording or soutache to your designs.
When cording is used to create emphasis or a focal point to a standard embroidered design, the result is spectacular. The low stitch count necessary to tack down the cording barely adds to the overall stitch count of the design, but the look and texture that you add is immeasurable. I would suggest that every embroiderer consider this very versatile addition to their embroidery tool arsenal. Cording is not just for fashion anymore.
Wednesday, March 19, 2008
Sensational Sequins
When you think about sequins, you might think about runway fashions, costumes, or Vegas showgirls, but modern uses for this time tested embellishment techique have spread in all directions.
What sequins do is, get attention! We now use sequins on caps, T-shirts, sweats and just about anywhere you want to make an impact.
Using sequins in addition to standard embroidery allows you to make the design really stand out from the garment, and isn't that what we are really trying to do with our embroidered designs.
The great thing about sequins is that they can make any design a real standout without adding a lot of stitching and therefore gives you a lot of bang for your buck. If you are thinking about buying your first embroidery machine or adding another head make sure the machine you buy has a sequin attachment, you may not need it today but you will tomorrow. See the sequin attachment above at http://www.ricoma.us/machine1.cfm
Tuesday, March 18, 2008
The newly re-designed RCM-1501 PT is not only beautiful, sleek and modern, it is also an efficient, easy to use workhorse.
It has everything you could ever need or want in an embroidery machine. If you are looking to upgrade from a home machine to a commercial machine, buy your first embroidery machine or you want to add another embroidery head to your shop, this is the first machine you should consider. To find out more about this model and all of the others go to www.yamata.com
Subscribe to:
Posts (Atom)